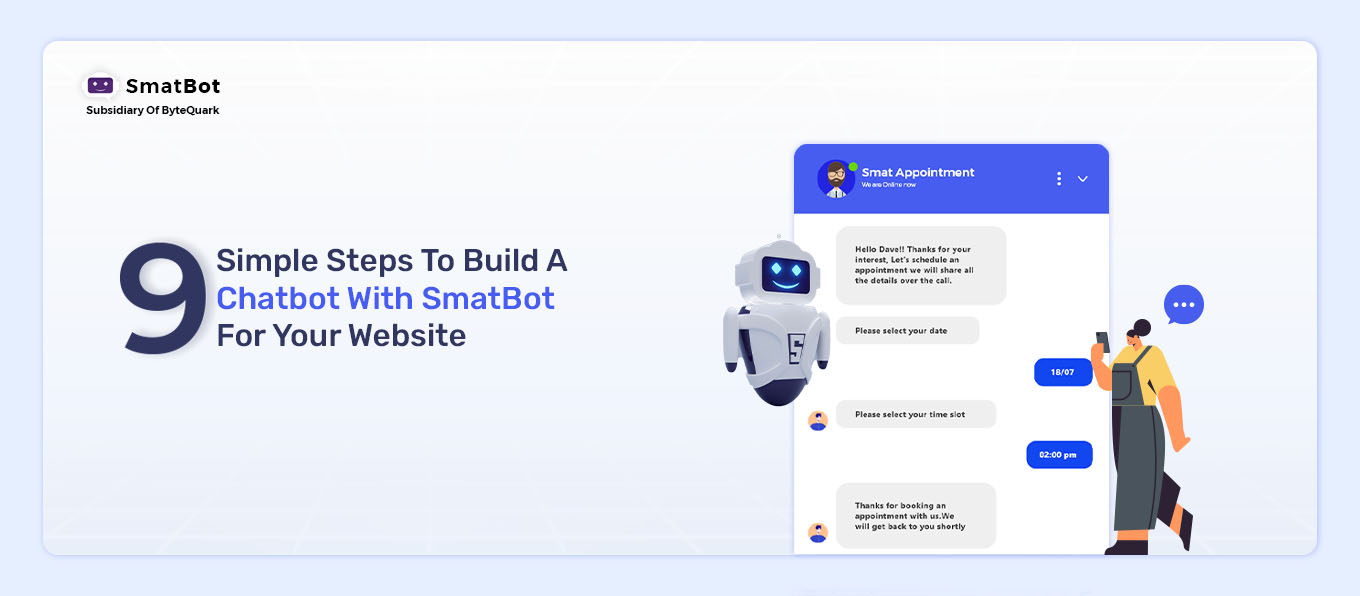
How to Create a Chatbot using SmatBot in 2023
Chatbots are the future of online communication. In fact, it’s hard to think of a website that doesn’t use one. That’s why we’re here to help you build your own chatbot so your website can be at the forefront of the conversational revolution.
Moreover, chatbots are a great way to add an extra layer of convenience to your customers’ experience. They can save you time and money by automating processes and also help you engage with your customers in a more personal way.
But before you can start building a chatbot, you need to decide which type of chatbot you need. Hence, to help you, we’ve compiled this list of some of its essential use cases:
- Offer On-Demand Support And Engagement
- Improves User Retention
- Offer Product Recommendations
- Eases Appointment Bookings
- Automate Sales & Lead Generation
- Marketing And Advertising
- Billing Support And Complaint Management
- Automate E-Commerce Support
- Real-Time Data Collection And Reporting
Once you’ve identified your purpose, it’s time to decide where you want your chatbot to appear.
Chatbots can be installed on various platforms such as WhatsApp, Facebook, Instagram, website, etc. You need to decide where you want to install your chatbot.
Finally, once you’ve chosen how and where to display your chatbot, it’s time to choose which platform will support it!
To help you, we recommend one of the most feature-rich and in-demand chatbot platforms, i.e., SmatBot.
Yes, you heard it right!
SmatBot can help you build an omnichannel and multilingual chatbot for your website in no time and the best part is that you don’t need to be techy to use this platform to create your bot.
If you want to build a chatbot for your business, this article is for you. It doesn’t matter what kind of business you’re in; you can use this guide to build your own chatbot in just a few minutes.
So without any further ado, let’s get started.
9 Simple Steps To make a Chatbot
Step 1: Navigate to SmatBot Website.
Go to smatbot.com
Step 2: Click on Free Trial
The first step is to click the “Free Trial” button; you will be redirected to the signup page.

Step 3: Sign Up on SmatBot
Once you click the Free Trial option, the signup page will open up. Here, you will need to fill in the required details such as the plan you’re interested in, your email address, your website url , and create a password.

After that, simply hit the “Signup” button.
Once you click the Sign-up button, the next window will open up where you need to give your name and your phone number. Then in the next step, you need to push the “Submit” button. This will take you on the SmatBot dashboard.

Step 4: Create A Chatbot
Once you enter the dashboard, you will find the option for “Create New Bot”; simply click that button.

The new window will pop up with two options.

- Lead Generation Bot (or) Any Data Collection Bot
- Customer Support Bot.
You have to choose between them based on your needs.
Here, for example, I am selecting “Lead Generation Bot” This will pop up a new window with two options: “Pick From Templates” or ” Create New Own Bot.”

If you select the “Pick from Templates” option, you will get several pre-designed templates, from which you pick as per your desire.

Or, if you want to create a whole new bot from scratch, you can select the other option, “Create Your Own Bot”.
Step 5: Bot Name
After selecting your desired option, you must enter your bot’s name.

Step 6: Click On the Setup Option

Here you will find three options:
- View Setup
- Flow Setup
- Install

Let’s discuss these options one by one.
View Setup: In view setup, you can customize the look of your bot.

In the “Text” section, you will have many options for customization, such as bot name, welcome text, bot description, and fonts.

In the “Logo” section, you can add our company logo and avatar for your bot.

In the “Layout” tab, you will find options to change the position of your bot, message bubble, button text alignment, etc.

In the “Themes” section, you can customize the colors as per your preference. Here you will get so many options for changing the color of your bot, like header background, question and answer background, chat background, etc.
Once you have done with the customization, save your changes.
Flow Setup –
The next setting is “Flow Setup” in this section; you can design the flow of your bot.
Here you will find various question types such as ask user, show user, FAQ setup, AI-enabled, the live agent, only for WhatsApp and only for Instagram.

Let’s understand it with one section:
Ask User:
In this section, you can design a flow for asking a series of questions once a visitor lands on your website. Simply drag and drop any type of element like a question, single choice, mobile number, etc. and customize it according to your requirement.

For example, I have selected the “Email” element; here, it will provide different options for customization like entering your email, toggle options for “strict validation,” and “do not restrict to company emails”. Not only this, but you can also show your site visitor an error message in case of invalid email input.
In addition, SmatBot also gives you the flexibility to add media like images, videos, and gifs.

Further, it has advanced functionalities like “Time Based Greeting” and Data Referencing.
Data Referencing – With this feature, you can use data from the previous answer throughout the flow and select data from the SDK object to capture visitors information.

Time-Based Greeting – With this option, you can greet the customer with a time-based greeting.

Similarly, you can edit other sections as well. You can even delete and duplicate the fields.
You can also add jumps to the questions whenever needed. If you don’t want to add a jump, the next question will automatically appear in the next line.


Save the changes once you are done.
Step 7: Preview
Click the “Preview” button to see your bot’s final look.


Step 8 – Install Your Bot.
Finally, the last step is to install the chatbot on your website.
For this, you need to switch to the “Install tab,” here, you will get the code you need to copy and paste into your website’s header.php or index.html file.
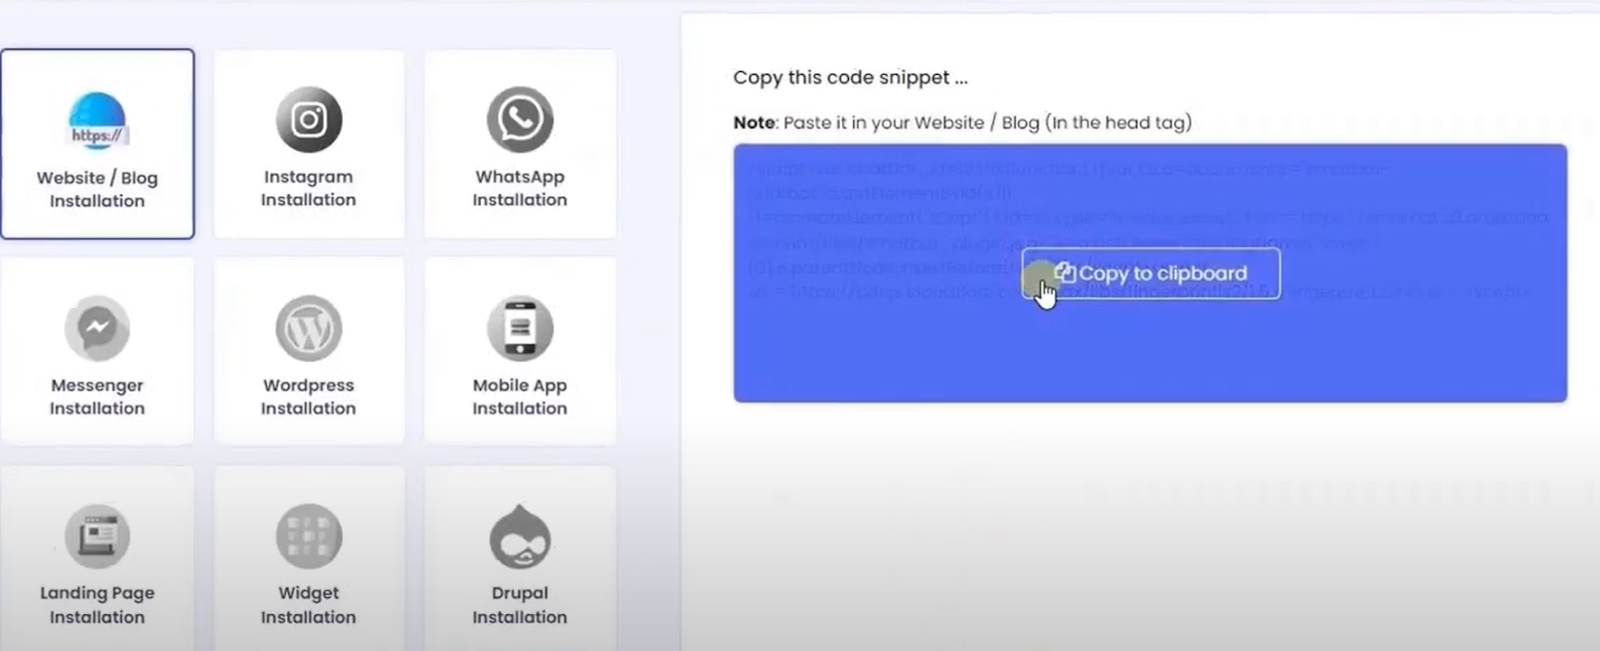

Step: 9 Check Your Website
Open your website and check if everything is working fine.
Congratulations, you’ve successfully created your chatbot without requiring any coding knowledge.
Conclusion :
Today, chatbots play a crucial role in many aspects of a business. AI Chatbot like SmatBot helps to broaden your company’s potential and enables you to provide superior customer service 24/7.
Not only this, but it can also generate leads, increase engagement, schedule meetings, and effectively direct conversations to the right person.
Moreover, this can streamline and automate your tasks and give teams more time to focus on essential business operations. In addition, building a chatbot is not that difficult if done correctly with the right chatbot platform like SmatBot.
Hence, in this post, we’ve shared our step-by-step guide for building a chatbot with SmatBot for your website.
We hope you’ve learned how to build a chatbot from scratch and wish you the best with your project!
Certainly, here’s an additional line highlighting the limitations of chatbots to be added to your content:
“However, it’s important to keep in mind that while chatbots offer numerous benefits, they also have limitations, such as their potential to struggle with nuanced, complex conversations and the inability to fully replicate human empathy and understanding.”
If you have any questions or comments, please let us know in the comments section below.