This tutorial will walk you through the steps of creating a WhatsApp chatbot.
WhatsApp is a messaging application that has been around since 2009 and is one of the most popular messaging platforms in the world.
WhatsApp’s user base has grown rapidly over the years, which means there are a lot of people who use WhatsApp every day. Nowadays, most businesses use WhatsApp to communicate with their customers or clients via text or voice messages.
That’s why creating a chatbot for WhatsApp is an important step for any business that wants to improve its customer experience and gain more customers over time.
There are two methods you can use to build a WhatsApp chatbot:
- The first option is ideal for those who love to code. If you are a programmer, you can code it to create a WhatsApp bot.
- The second option is suitable for everyone, from beginners to experts. You can use a powerful AI chatbot platform like SmatBot to build a professional WhatsApp bot within minutes. And the best part is, you don’t need to be a coder, as it doesn’t require any technical or coding skills.”
So, if you choose the second option, this blog is for you. Here, we can assist you in setting up your WhatsApp bot with SmatBot.
But before moving further, let’s understand what exactly a WhatsApp bot is.
What are WhatsApp chatbots?
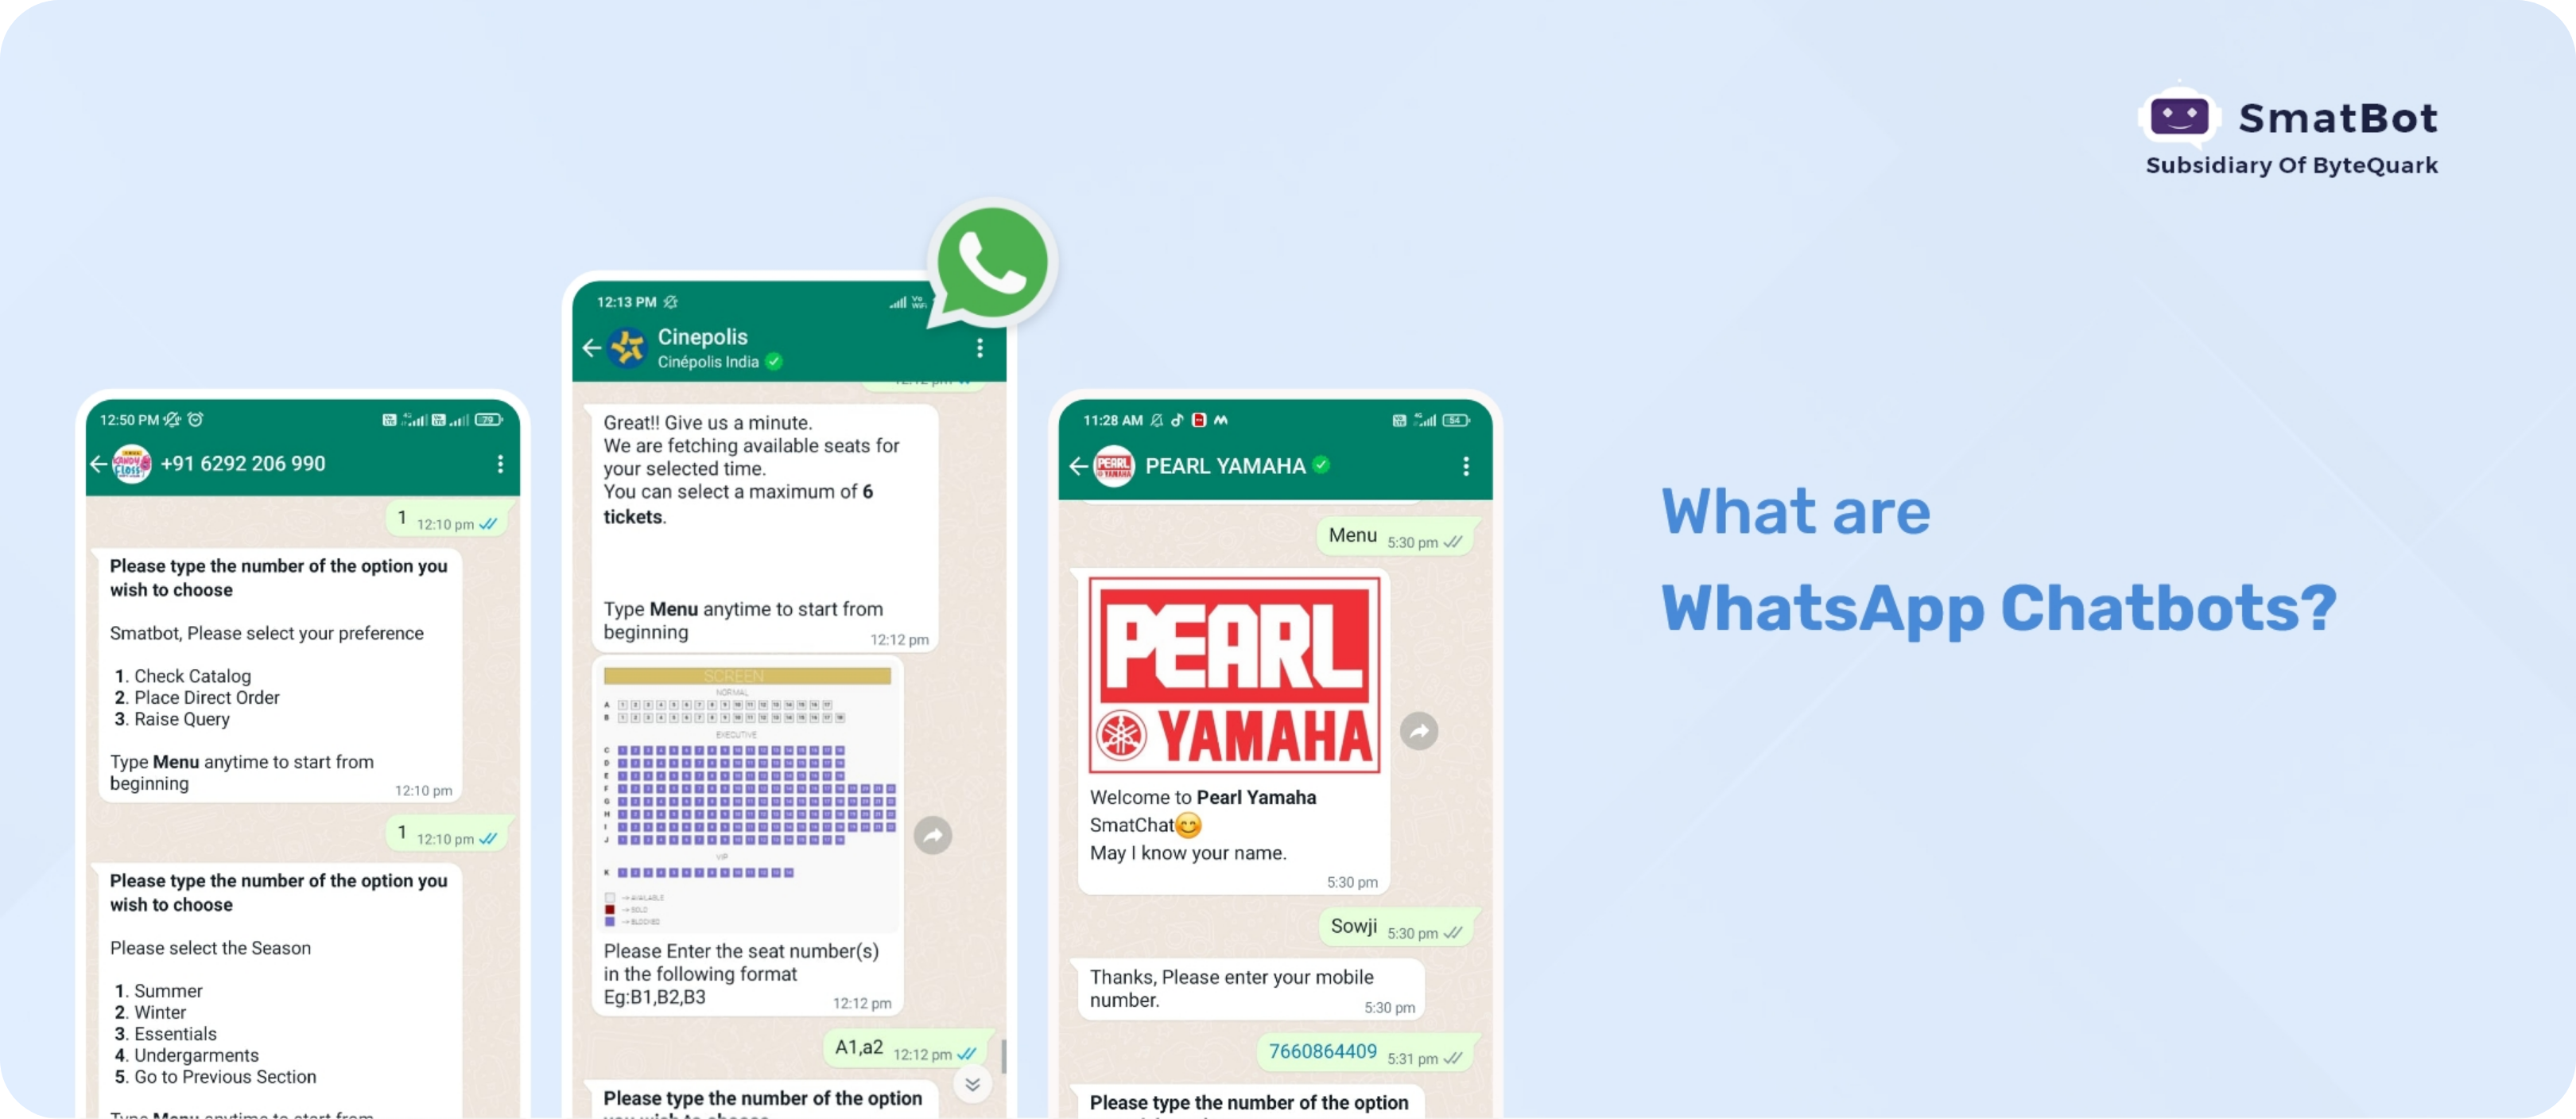
A WhatsApp chatbot is software that allows you to automate different crucial tasks on WhatsApp, such as sales and customer assistance. It is an artificial intelligence technology that assists brands in simulating human interactions. If you want to provide excellent customer service, you might consider using WhatsApp chatbots.
You cannot personally communicate with every consumer as your firm grows and your client base expands. This will also extend the time it takes for clients to get a reply from you. This can lead to decreased customer satisfaction. That’s where a WhatsApp bot can help. It can handle a large number of conversations simultaneously, ensuring that your customers receive prompt and satisfactory responses.
Furthermore, WhatsApp is the most popular mobile messaging app among audiences, with 2 billion monthly active users worldwide. It’s no surprise that assisting your consumers on the platform they already prefer will be a great idea for your business.
Why should you create a WhatsApp chatbot?

Businesses are increasingly using WhatsApp Bots like SmatBot to engage with customers, and they’re turning to mobile messaging apps like WhatsApp for several reasons.
Here are some reasons you should consider using a WhatsApp bot in your business:
- They’re easy to set up.
- They’re accessible 24/7/365.
- They are a cost-effective way to improve your customer service.
- They can increase engagement on your app.
- They can help you improve customer loyalty.
- They can automate parts of your business process that are tedious or time-consuming.
- They can be a great way to drive sales.
- They can connect with new customers and existing customers at the same time.
- They save you time and money.
Now, it’s time to jump to the main section of our blog.
So, without any further ado, let’s get started.
8 simple steps to create a WhatsApp chatbot with SmatBot – Step-by-step guide:
Step 1: Go to SmatBot website
Visit “https://www.smatbot.com/”

Step 2: Sign up on SmatBot and create a chatbot.
If you are a first-time user of SmatBot, you must sign up and create a chatbot. You can follow this guide.
If you have already created your bot with SmatBot, you can skip this step and jump to the 3rd step.
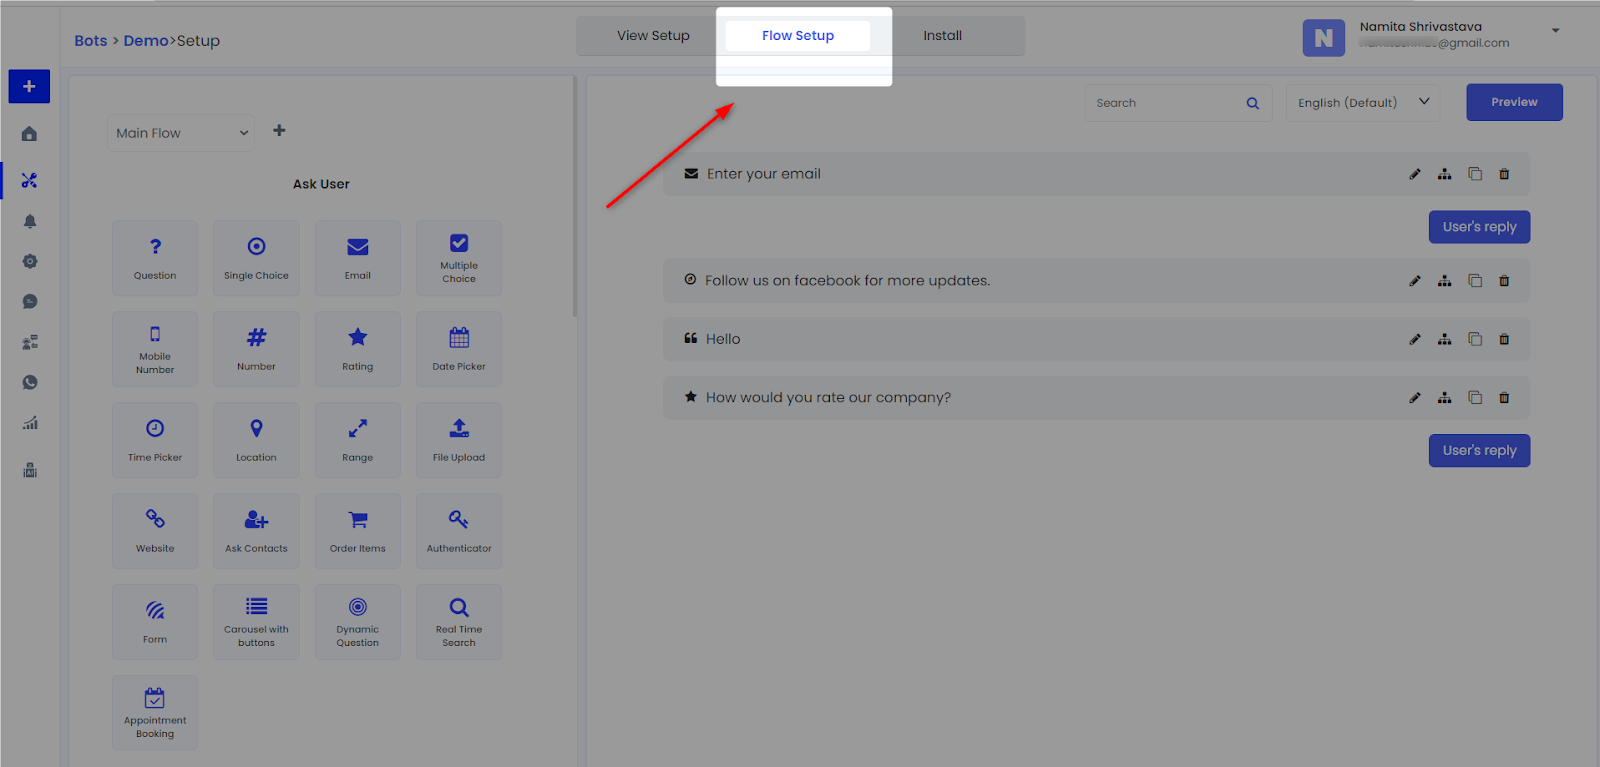
Step 3: Flow Setup
You need to choose the bot for which you wish to integrate WhatsApp. Then, navigate to the “Flow Setup” tab.
Step 4: Only for WhatsApp
Under the “Flow Setup” tab, scroll down: you will find the option “Only for WhatsApp”.
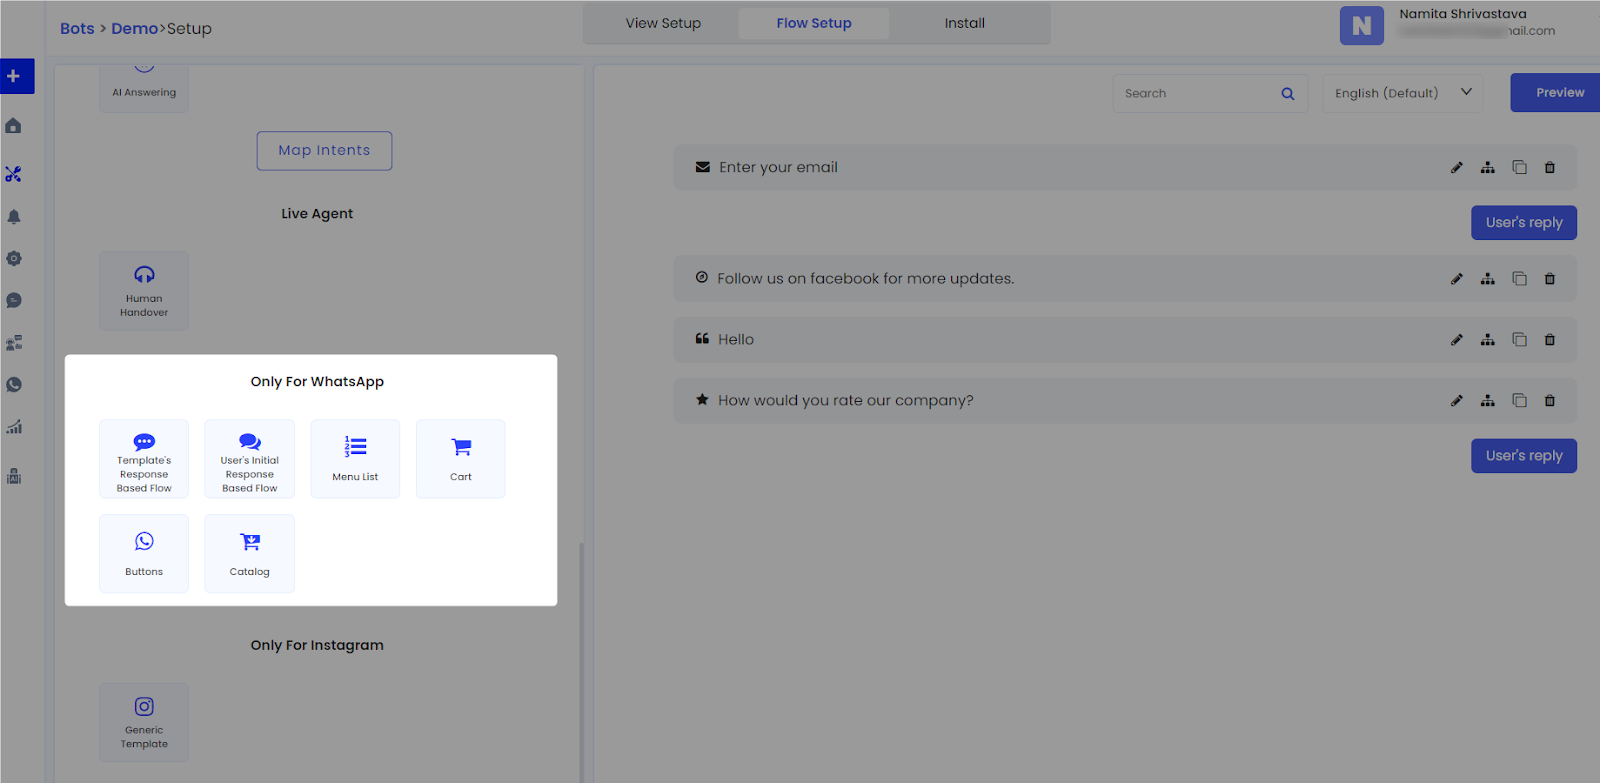
Here, you need to click on “User’s Initial Response Based flow” to trigger the response based on the user’s reply.
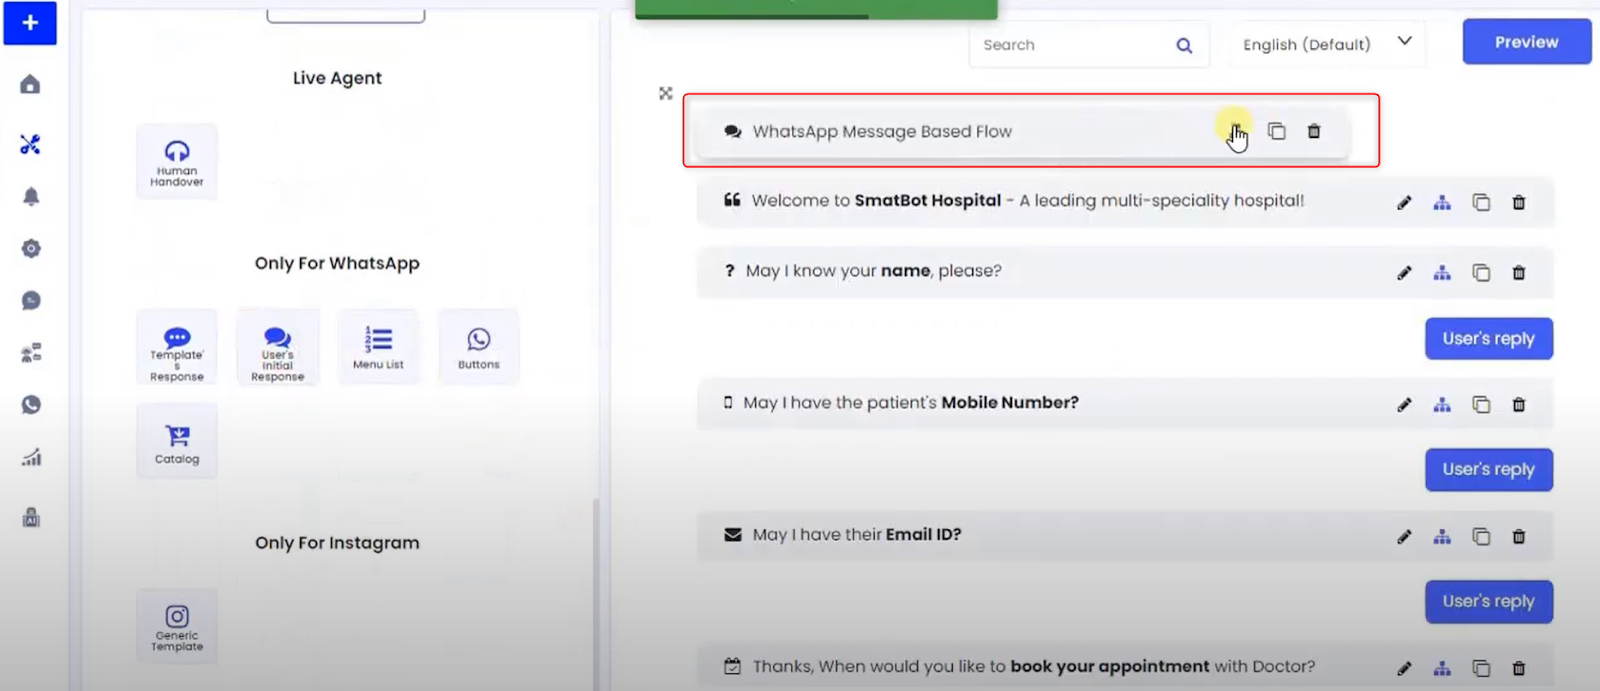
Then, you can edit the question as per your business requirement and save the changes.

Step 5: Menu List
You can choose an option from the “Menu List”. Simply drag this option to the flow of your bot setup.

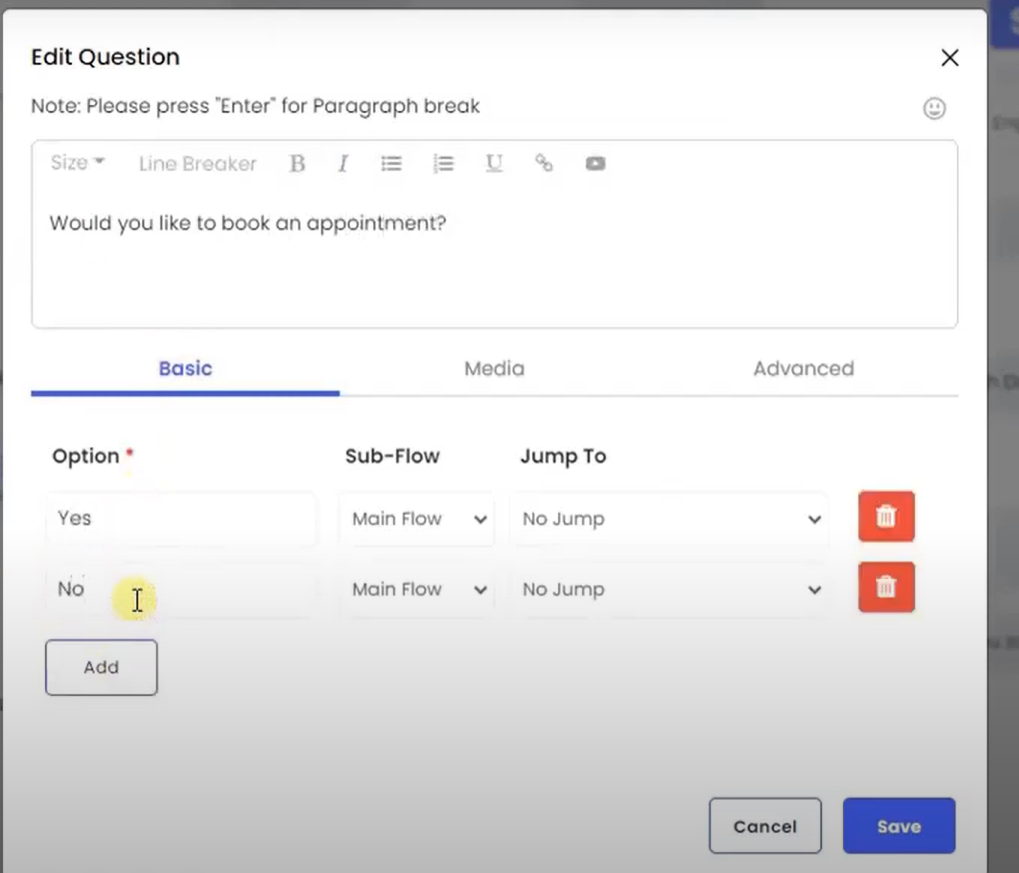
It will provide you with a list of options; you can choose and edit it as per your preference.

In the “Edit Question” window, you will have different settings which you can customize according to your requirement.
For example: In the basic setting, you will find various options for customization like title, description, sub-flow, etc. Similarly, in the media section, you can add images or videos as per your business needs.
Once you are done with the customization, you can save the changes.

Step 6: Display a WhatsApp button.
You can also add a WhatsApp button to the flow of your bot setup and edit it as per your desire.


You can also add jumps to the section wherever needed.

Step 7: Connect WhatsApp Business Account
Now click on the “Install” tab and choose “WhatsApp Installation” from the available options.

Next, click on the “Add New WhatsApp Account” button, and a pop-up window will open asking for details like WhatsApp business API, WhatsApp name, WhatsApp number, and product token. You need to fill in these details and then hit the “Save” button.

Congratulations! You have successfully connected your WhatsApp business account.

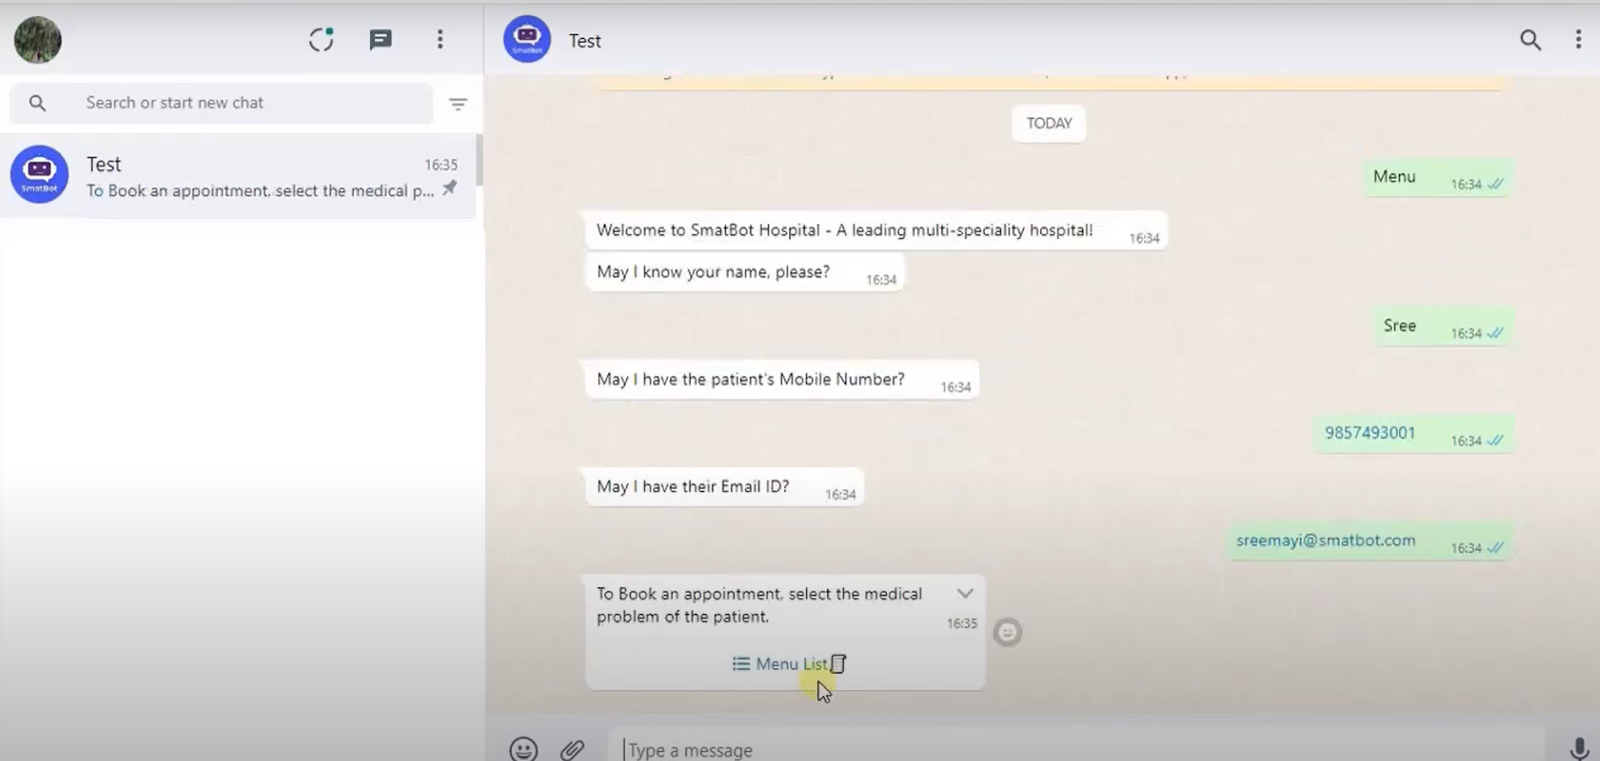
Step 8: Preview
You can preview the flow of your WhatsApp bot using “web.whatsapp.com”.
Wrapping Up
That’s a wrap!
The world of chatbots is growing rapidly. Today, more and more businesses are using chatbots in their marketing campaigns to reach out to customers and prospects.
Whether you’re trying to sell products or services, market your brand, or just want to create a new customer experience, AI chatbots like SmatBot can help make your business more efficient and effective.
In this article, we’ve looked at what a WhatsApp chatbot is and why you should create one. We’ve also looked at how to create a WhatsApp chatbot step by step using SmatBot.
We hope you’ve enjoyed this tutorial. If you have any questions or comments, please let us know in the comments below!